The Best Fluffy Pancakes recipe you will fall in love with. Full of tips and tricks to help you make the best pancakes.
Introduction
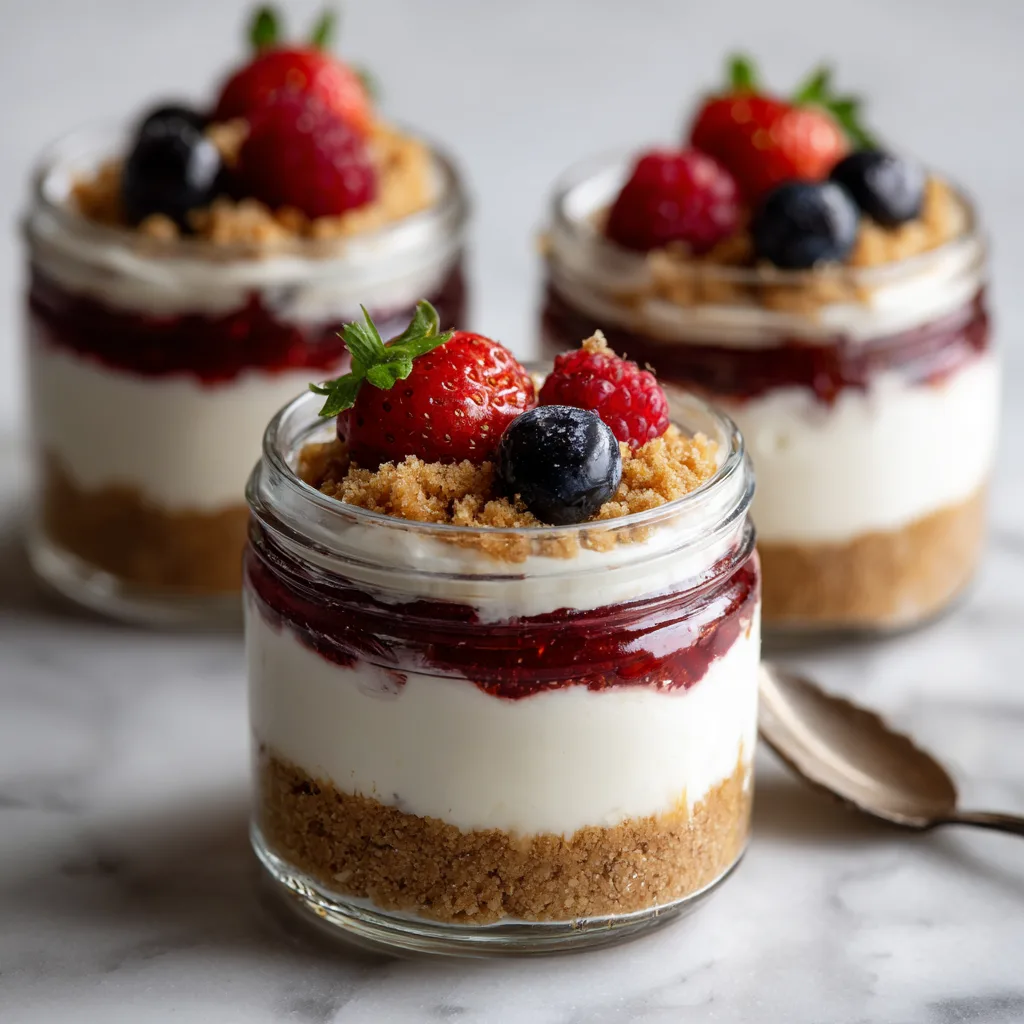
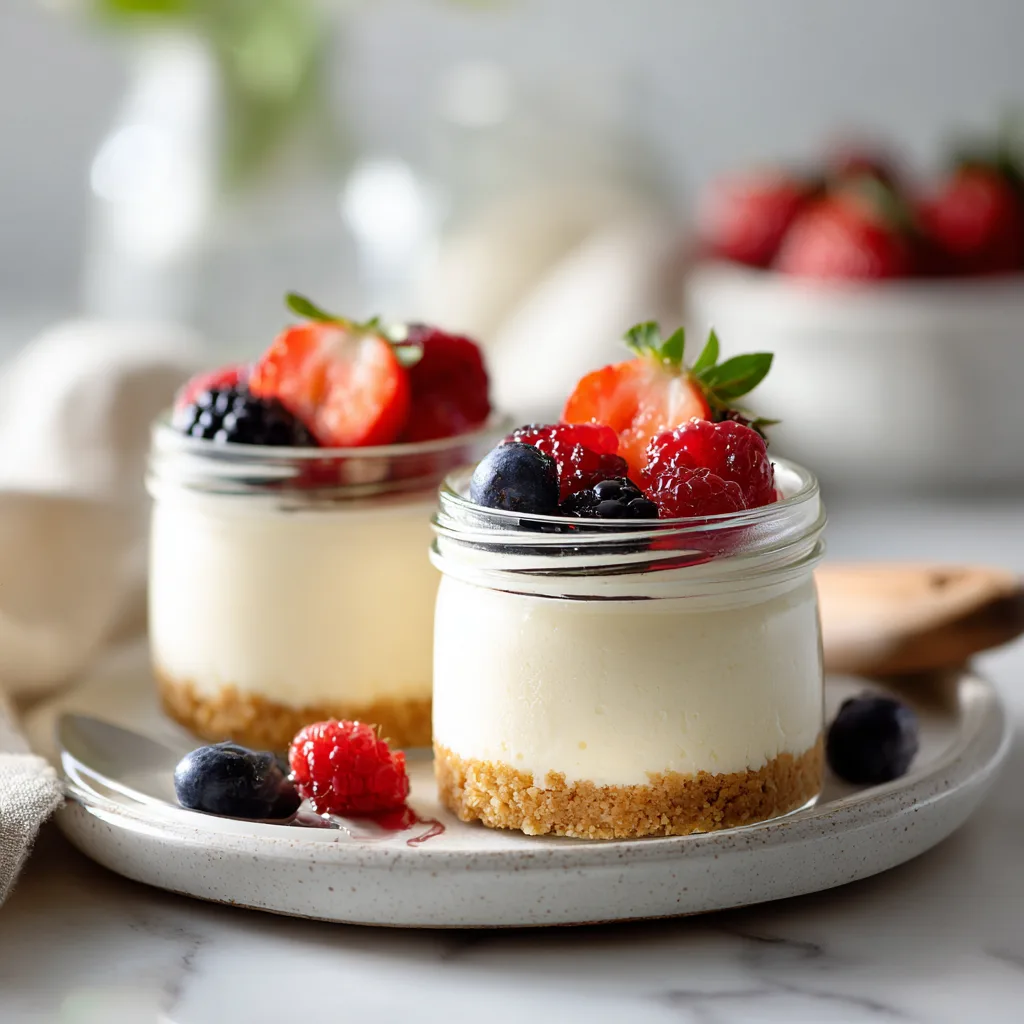
There is something irresistibly charming about desserts served in individual jars. They feel elegant, effortless, and just a little bit special. These No-Bake Cheesecake Jars bring together everything people love about classic cheesecake without the stress of baking, water baths, or worrying about cracks on top.
Each spoonful delivers buttery graham cracker crumbs, rich cream cheese filling, and bright fruit topping in perfect layered harmony. The texture is smooth and airy, the flavor is sweet with just enough tang, and the presentation makes them look bakery-worthy even though they are surprisingly simple to make.
Whether you’re preparing a spring brunch, a summer dinner party, or simply craving a make-ahead dessert, these cheesecake jars are the kind of treat that disappears fast. Best of all, they can be made ahead, chilled, and served straight from the refrigerator.
Why You’ll Love This Recipe
- No oven required, making it perfect for warm days
- Individual portions look beautiful for entertaining
- Creamy texture with a rich cheesecake flavor
- Easy to prepare ahead of time
- Customizable with endless topping options
- Beginner-friendly with simple ingredients
- Less messy than slicing traditional cheesecake
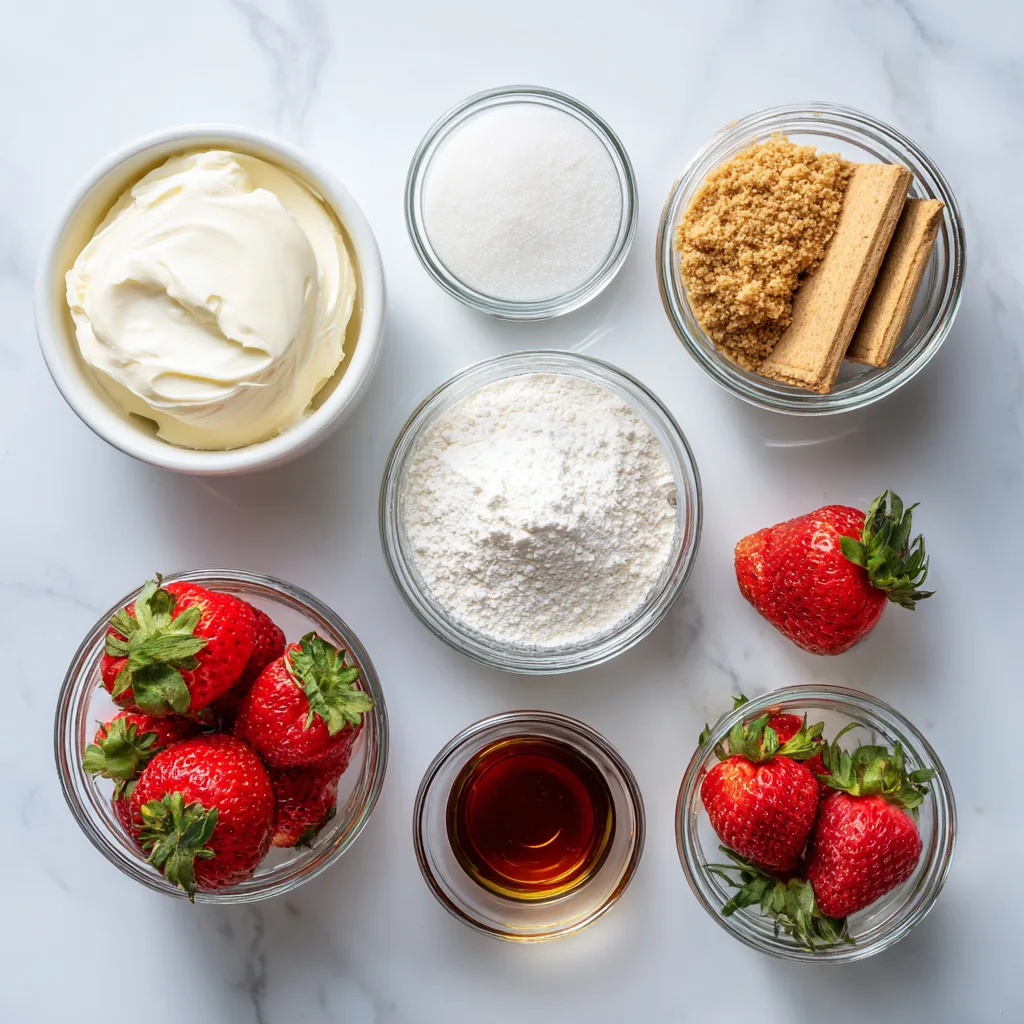
Ingredients
Crust Layer
- 1 1/2 cups graham cracker crumbs
- 5 tablespoons unsalted butter, melted
- 2 tablespoons granulated sugar
Cheesecake Filling
- 16 ounces cream cheese, softened
- 3/4 cup powdered sugar
- 1 teaspoon vanilla extract
- 1 cup heavy whipping cream
Topping
- 1 cup fresh strawberries, sliced
- 1/2 cup blueberries
- 2 tablespoons strawberry jam, slightly warmed
- Fresh mint leaves for garnish (optional)
Instructions
- Prepare the crust
In a medium bowl, combine the graham cracker crumbs, melted butter, and sugar. Stir until the mixture resembles wet sand. - Fill the jars with crust
Spoon about 2 tablespoons of the crumb mixture into the bottom of each jar. Press lightly using the back of a spoon. - Beat the cream cheese
In a large bowl, beat the softened cream cheese until smooth and fluffy. - Add sweetness and flavor
Mix in the powdered sugar and vanilla extract until creamy and well blended. - Whip the cream
In a separate bowl, whip the heavy cream until stiff peaks form. - Fold gently
Fold the whipped cream into the cream cheese mixture carefully to keep the filling light and airy. - Assemble the jars
Spoon or pipe the cheesecake filling over the crust layer in each jar. - Add topping
Toss the berries with warmed strawberry jam and spoon over the cheesecake layer. - Chill
Refrigerate the jars for at least 2 hours before serving. - Garnish and serve
Top with mint leaves if desired and serve chilled.
Pro Tips
- Use room temperature cream cheese for the smoothest filling.
- Pipe the filling using a piping bag for cleaner layers.
- Chill overnight for deeper flavor and firmer texture.
- Add toppings just before serving to keep fruit fresh.
- Use small jars for the prettiest presentation.
Variations
Chocolate Cheesecake Jars
Add 2 tablespoons cocoa powder to the filling and top with chocolate curls.
Lemon Cheesecake Jars
Mix in lemon zest and lemon juice for a bright citrus flavor.
Caramel Pecan Jars
Drizzle caramel sauce over the top and sprinkle with toasted pecans.
Serving Suggestions
These cheesecake jars pair beautifully with:
- Fresh brewed coffee
- Sparkling lemonade
- Dessert charcuterie boards
- Brunch buffets
- Holiday dessert tables
Serve them with long dessert spoons so guests can enjoy every delicious layer.
Storage & Reheating
Store the jars covered in the refrigerator for up to 4 days.
For longer storage:
- Freeze without fresh fruit topping for up to 1 month
- Thaw overnight in the refrigerator before serving
Because this is a chilled dessert, reheating is not necessary.
Common Mistakes to Avoid
Overmixing the filling
Too much mixing can make the texture heavy instead of fluffy.
Using cold cream cheese
Cold cream cheese can leave lumps in the filling.
Skipping chill time
The filling needs proper chilling to set.
Too much butter in crust
Excess butter can make the crust greasy.
Watery toppings
Drain juicy fruit before adding so the dessert stays neat.
Cultural Context or Fun Facts
Cheesecake dates back more than 4,000 years to ancient Greece, where early versions were served to athletes during the first Olympic games. Modern no-bake cheesecake became popular in the United States in the mid-20th century as home cooks looked for simpler desserts that still felt luxurious.
Serving cheesecake in jars is a modern twist that combines nostalgic flavor with stylish presentation. It has become especially popular for parties, weddings, and social media-worthy dessert tables.
FAQs
Can I make these the day before?
Yes, they are actually better after chilling overnight.
Can I use frozen berries?
Yes, but thaw and drain them well first.
Can I use store-bought whipped topping?
Yes, though fresh whipped cream gives better flavor.
What jars work best?
Small 4 to 6 ounce mason jars work perfectly.
Can I make them less sweet?
Reduce powdered sugar slightly without affecting texture.
Can I make them gluten-free?
Use gluten-free cookie crumbs for the crust.
No-Bake Cheesecake Jars
Creamy layered cheesecake jars with graham cracker crust and fresh berry topping that require no baking.
Ingredients
Equipment
Method
- Combine graham cracker crumbs, melted butter, and sugar until evenly moistened.
- Press the crumb mixture into the bottom of each jar.
- Beat cream cheese until smooth, then mix in powdered sugar and vanilla.
- Whip heavy cream to stiff peaks and fold into the cream cheese mixture.
- Spoon or pipe filling into jars over the crust.
- Top with berries mixed with warmed jam and chill for at least 2 hours before serving.
Notes
For best texture, chill overnight before serving.