The Best Fluffy Pancakes recipe you will fall in love with. Full of tips and tricks to help you make the best pancakes.
Introduction
If there’s one recipe that completely took over lunch meal prep this year, it’s the famous dense bean salad. Originally popularized on TikTok for being ridiculously filling, colorful, and easy to customize, this salad quickly became more than just a trend. It’s now the kind of recipe people keep making week after week because it genuinely works for busy lives.
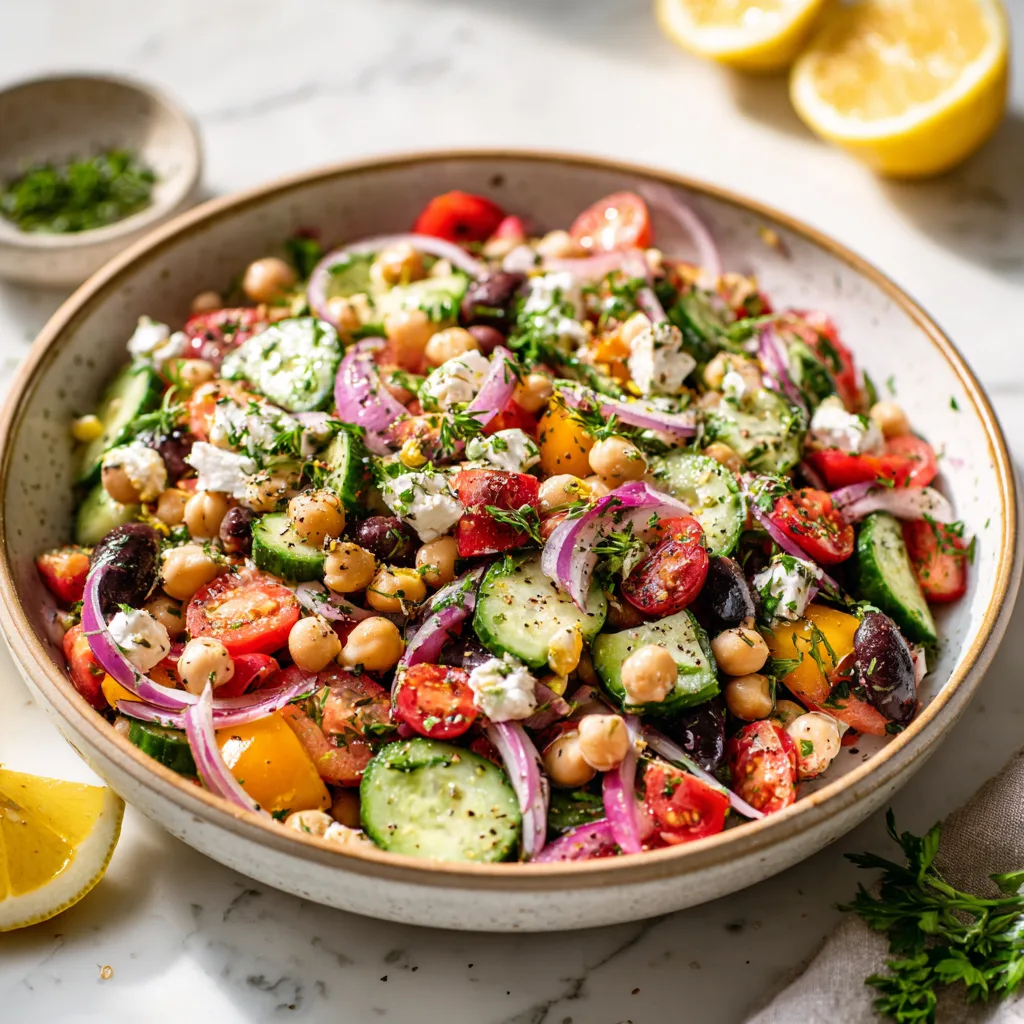
This Crunchy Dense Bean Salad is everything a great lunch should be: hearty, refreshing, protein-packed, and loaded with texture. Every bite delivers creamy beans, crisp cucumbers, juicy tomatoes, salty feta, sharp red onion, and a zippy lemon dressing that ties the entire bowl together. Unlike leafy salads that wilt within hours, this bean salad actually tastes better after sitting in the fridge, making it perfect for meal prep.
What makes this recipe stand out is the balance. It’s nutritious without feeling overly “healthy,” filling without being heavy, and simple without tasting boring. Beans bring a creamy richness and plenty of plant-based protein, while fresh herbs and crunchy vegetables keep the salad bright and vibrant.
Whether you’re searching for a high-protein lunch, a picnic side dish, a light dinner, or a meal-prep recipe that won’t disappoint by day three, this dense bean salad deserves a permanent spot in your rotation.
Why You’ll Love This Recipe
- Packed with protein and fiber for long-lasting energy
- Perfect for meal prep because it stays fresh for days
- No cooking required besides simple prep work
- Naturally hearty and satisfying
- Easy to customize with different vegetables and cheeses
- Loaded with crunchy, creamy, and juicy textures
- Great for lunches, picnics, potlucks, or light dinners
- Uses affordable pantry staples
- Delicious both cold and room temperature
- Beginner-friendly and nearly impossible to mess up
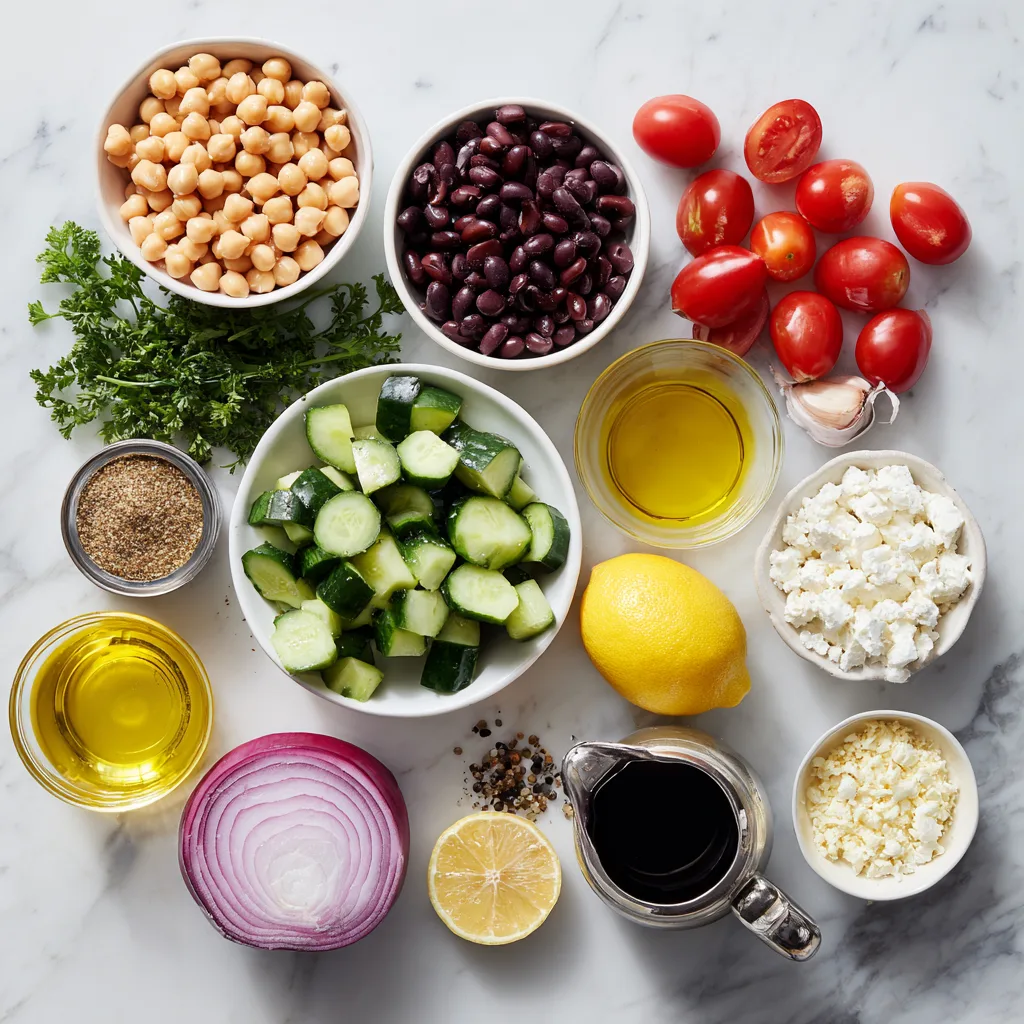
Ingredients
For the Salad
- 1 can chickpeas, drained and rinsed
- 1 can cannellini beans, drained and rinsed
- 1 can black beans, drained and rinsed
- 1 cup cherry tomatoes, halved
- 1 large cucumber, diced
- 1/2 red onion, finely diced
- 1/2 cup crumbled feta cheese
- 1/4 cup chopped fresh parsley
- 1 avocado, diced
- 1/4 cup roasted sunflower seeds for crunch
For the Lemon Herb Dressing
- 1/4 cup extra virgin olive oil
- 2 tablespoons fresh lemon juice
- 1 teaspoon Dijon mustard
- 1 garlic clove, minced
- 1 teaspoon honey
- 1/2 teaspoon sea salt
- 1/4 teaspoon black pepper
- 1/2 teaspoon dried oregano
Optional Add-Ins
- Grilled chicken
- Tuna
- Quinoa
- Olives
- Roasted corn
- Pickled onions
- Jalapeños
Instructions
Step 1: Prepare the Beans
Drain and rinse all the beans thoroughly under cold water. This removes excess sodium and improves the flavor. Let them sit in a colander for a few minutes so the salad doesn’t become watery later.
Step 2: Chop the Vegetables
Dice the cucumber into bite-sized pieces, halve the cherry tomatoes, finely chop the red onion, and roughly chop the parsley. If using avocado, cube it just before serving to keep it fresh.
Step 3: Make the Dressing
In a small bowl or jar, whisk together olive oil, lemon juice, Dijon mustard, garlic, honey, oregano, salt, and black pepper until smooth and glossy.
The dressing should taste bright and slightly tangy with enough salt to balance the beans.
Step 4: Combine the Salad
In a large mixing bowl, add the chickpeas, cannellini beans, black beans, cucumber, tomatoes, onion, parsley, sunflower seeds, and feta cheese.
Pour the dressing over the salad and toss gently until everything is evenly coated.
Step 5: Let the Flavors Develop
For the best flavor, refrigerate the salad for at least 20–30 minutes before serving. This allows the beans to absorb the dressing and makes the salad even more delicious.
Step 6: Finish and Serve
Just before serving, fold in the avocado if using. Taste and adjust seasoning with extra lemon juice, salt, or pepper as needed.
Serve chilled or slightly cool for the ultimate refreshing lunch bowl experience.
Pro Tips
Dry the Beans Well
Excess moisture is the enemy of a flavorful bean salad. After rinsing, let the beans drain properly or pat them dry with paper towels.
Dice Everything Evenly
Uniform pieces make the salad easier to eat and ensure every bite has a balanced mix of ingredients.
Don’t Skip the Resting Time
Dense bean salad tastes dramatically better after sitting for at least 30 minutes because the dressing soaks into the beans.
Add Avocado Last
Avocado can become mushy if mixed too early. Add it right before serving for the best texture.
Use Fresh Lemon Juice
Fresh lemon juice makes a huge difference compared to bottled juice. It gives the dressing a fresher, brighter flavor.
Variations
1. Mediterranean Dense Bean Salad
Add Kalamata olives, artichoke hearts, roasted red peppers, and extra feta cheese for a Mediterranean-inspired version.
2. Spicy Southwest Version
Mix in corn, jalapeños, cilantro, and chipotle powder for a smoky and spicy twist.
3. High-Protein Chicken Bowl
Top the salad with grilled chicken breast or shredded rotisserie chicken to create an even more filling lunch.
4. Vegan Dense Bean Salad
Skip the feta cheese and use diced avocado or vegan feta for a fully plant-based version.
5. Crunchy Picnic Style
Add crushed pita chips or toasted bread cubes just before serving for extra crunch.
Serving Suggestions
Dense bean salad is incredibly versatile and can be served in many ways depending on the occasion.
For meal prep lunches, divide the salad into airtight containers and pair with pita bread or crackers. The hearty texture makes it satisfying enough to stand alone as a complete meal.
If serving for dinner, pair it with grilled chicken skewers, salmon, or warm flatbread. The refreshing acidity balances rich proteins beautifully.
Hosting a picnic or barbecue? Serve the salad in a large shallow platter with lemon wedges and extra herbs sprinkled on top. Because there’s no lettuce involved, it holds up exceptionally well outdoors.
You can even spoon it into wraps or pita pockets for an easy handheld lunch.
Storage & Reheating
Storage
Store dense bean salad in an airtight container in the refrigerator for up to 4 days.
In fact, the flavor often improves after the first day because the beans continue absorbing the dressing.
Reheating
This salad is designed to be served cold or at cool room temperature, so reheating isn’t necessary.
If adding proteins like chicken, you can warm them separately before serving alongside the chilled salad.
Meal Prep Tip
Keep avocado separate until serving to prevent browning and maintain the best texture.
Common Mistakes to Avoid
Using Wet Beans
Beans that aren’t drained properly dilute the dressing and make the salad watery.
Overseasoning Too Early
Beans absorb salt over time. Start lightly seasoned, then adjust after chilling.
Cutting Vegetables Too Large
Large chunks make the salad awkward to eat and prevent flavors from blending evenly.
Skipping Acid
The lemon juice is essential for balancing the richness of the beans. Without enough acidity, the salad can taste flat.
Forgetting Texture
Dense bean salad shines because of texture contrast. Crunchy cucumbers, seeds, and onions are just as important as the creamy beans.
Cultural Context and Fun Facts
Bean salads have existed in many cultures for generations, long before social media trends made them viral. Mediterranean cuisine frequently combines legumes with olive oil, herbs, and vegetables, while Latin American dishes often feature hearty bean-based salads and bowls.
The recent TikTok dense bean salad trend exploded because people wanted meals that were affordable, filling, nutritious, and easy to prepare ahead of time. Unlike delicate leafy salads, bean salads travel well, stay fresh longer, and provide substantial protein and fiber.
Beans themselves are among the oldest cultivated foods in human history and remain a staple in cuisines around the world because they are nutritious, versatile, and budget-friendly.
Cannellini beans offer a creamy texture, chickpeas add firmness and nuttiness, and black beans contribute earthy depth. Combining multiple varieties creates a more complex and satisfying salad experience.

FAQs
Can I make dense bean salad ahead of time?
Absolutely. This salad is ideal for meal prep and often tastes even better the next day.
Which beans work best?
A combination of textures works best. Chickpeas, cannellini beans, and black beans create a balanced flavor and texture profile.
Is dense bean salad healthy?
Yes. It’s packed with fiber, protein, vitamins, healthy fats, and minerals while remaining highly satisfying.
Can I freeze bean salad?
Freezing isn’t recommended because the vegetables lose their texture after thawing.
What protein can I add?
Grilled chicken, tuna, salmon, tofu, or hard-boiled eggs all work beautifully.
How do I keep the salad from getting soggy?
Drain beans thoroughly, avoid overdressing, and add watery ingredients like avocado right before serving.
Final Thoughts
Dense bean salad proves that simple ingredients can create something incredibly satisfying. It’s colorful, practical, nutritious, and endlessly customizable. More importantly, it’s the kind of recipe that fits into real life — easy enough for busy weekdays but flavorful enough to crave repeatedly.
The combination of creamy beans, crisp vegetables, salty feta, and vibrant lemon dressing creates a lunch bowl that feels fresh, hearty, and exciting all at once. Whether you discovered it through TikTok or are simply looking for a better meal-prep option, this recipe delivers every single time.
One bowl, minimal effort, and maximum flavor — that’s exactly why dense bean salad became viral in the first place.
Crunchy Dense Bean Salad
A hearty, protein-packed bean salad loaded with crisp vegetables, feta cheese, and a zesty lemon herb dressing perfect for meal prep lunches.
Ingredients
Equipment
Method
- Drain and rinse all beans thoroughly, then let them dry slightly.
- Chop the cucumber, tomatoes, onion, parsley, and avocado.
- Whisk together olive oil, lemon juice, Dijon mustard, garlic, honey, oregano, salt, and pepper.
- Combine beans, vegetables, feta, parsley, and sunflower seeds in a large bowl.
- Pour dressing over the salad and toss gently until coated.
- Chill for 20–30 minutes before serving for best flavor.
Notes
For maximum freshness, add avocado right before serving.