The Best Fluffy Pancakes recipe you will fall in love with. Full of tips and tricks to help you make the best pancakes.
Introduction
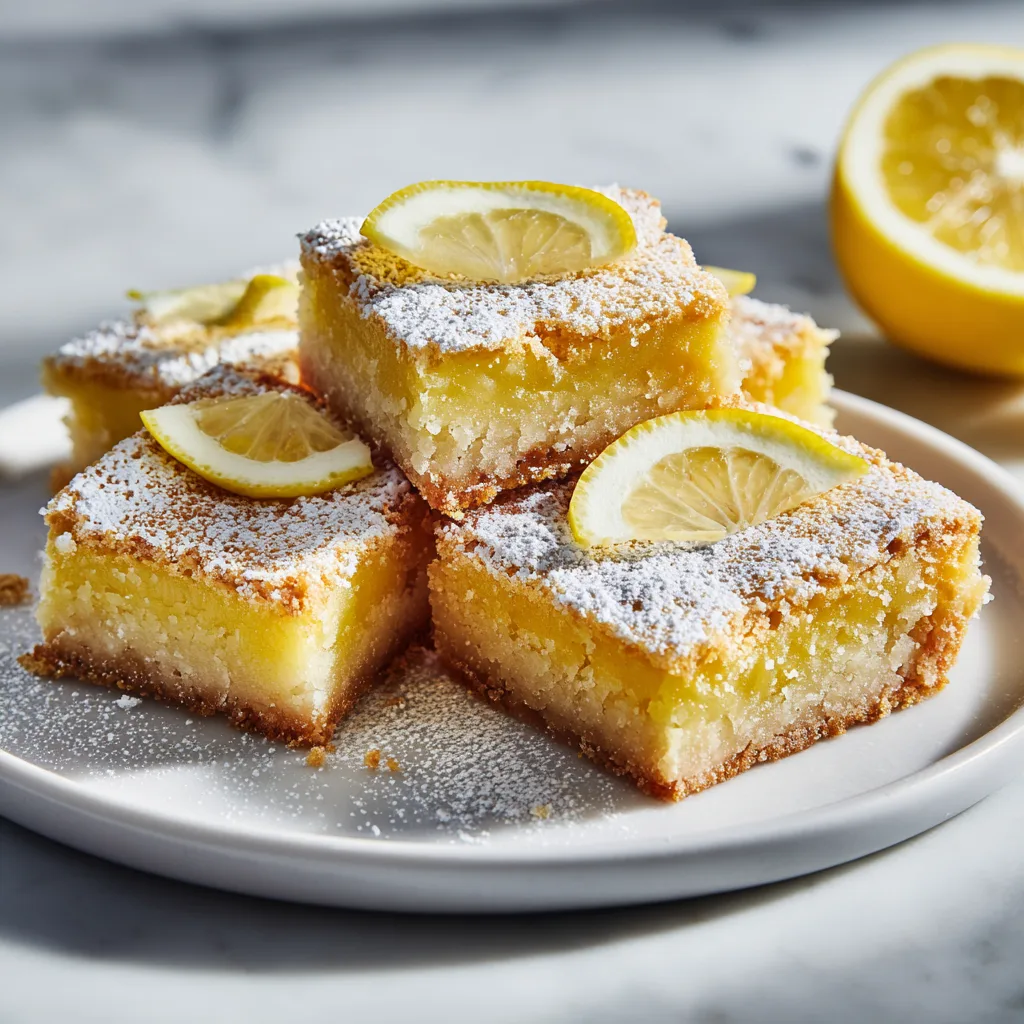
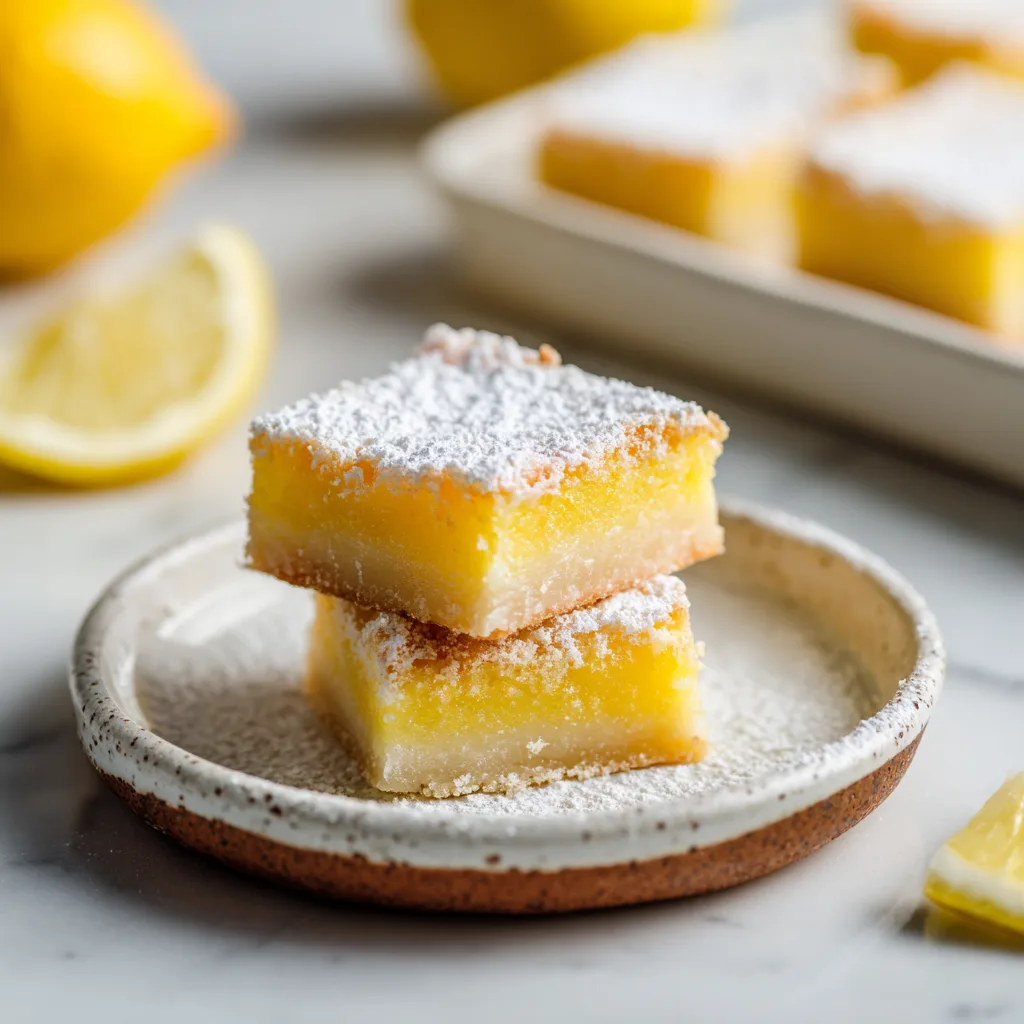
There’s something timeless about Lemon Bars. Maybe it’s the way that buttery shortbread crust melts beneath your fork, or how the silky lemon filling hits your taste buds with that perfect balance of tart and sweet. Or maybe it’s the nostalgia—those bake sales, family gatherings, and summer afternoons where a simple square of citrusy goodness could brighten your entire day.
These Zesty Sunshine Lemon Bars are everything you want in a classic dessert—but elevated. The crust is rich and tender, never dry. The lemon layer is smooth, vibrant, and bursting with real citrus flavor—not artificial sharpness. And that light snowfall of powdered sugar on top? It’s not just for looks—it adds the final touch of sweetness that brings everything together.
Whether you’re baking for a crowd, prepping a dessert for the weekend, or just craving something fresh and homemade, this recipe delivers every single time.
Why You’ll Love This Recipe
- Bright, tangy lemon flavor that tastes fresh—not overpowering
- Perfect balance between sweet and tart
- Buttery shortbread crust that holds its shape beautifully
- Simple pantry ingredients—nothing fancy required
- Ideal make-ahead dessert for gatherings or meal prep
- Cuts cleanly into neat squares for a bakery-style presentation
- Beginner-friendly with foolproof steps
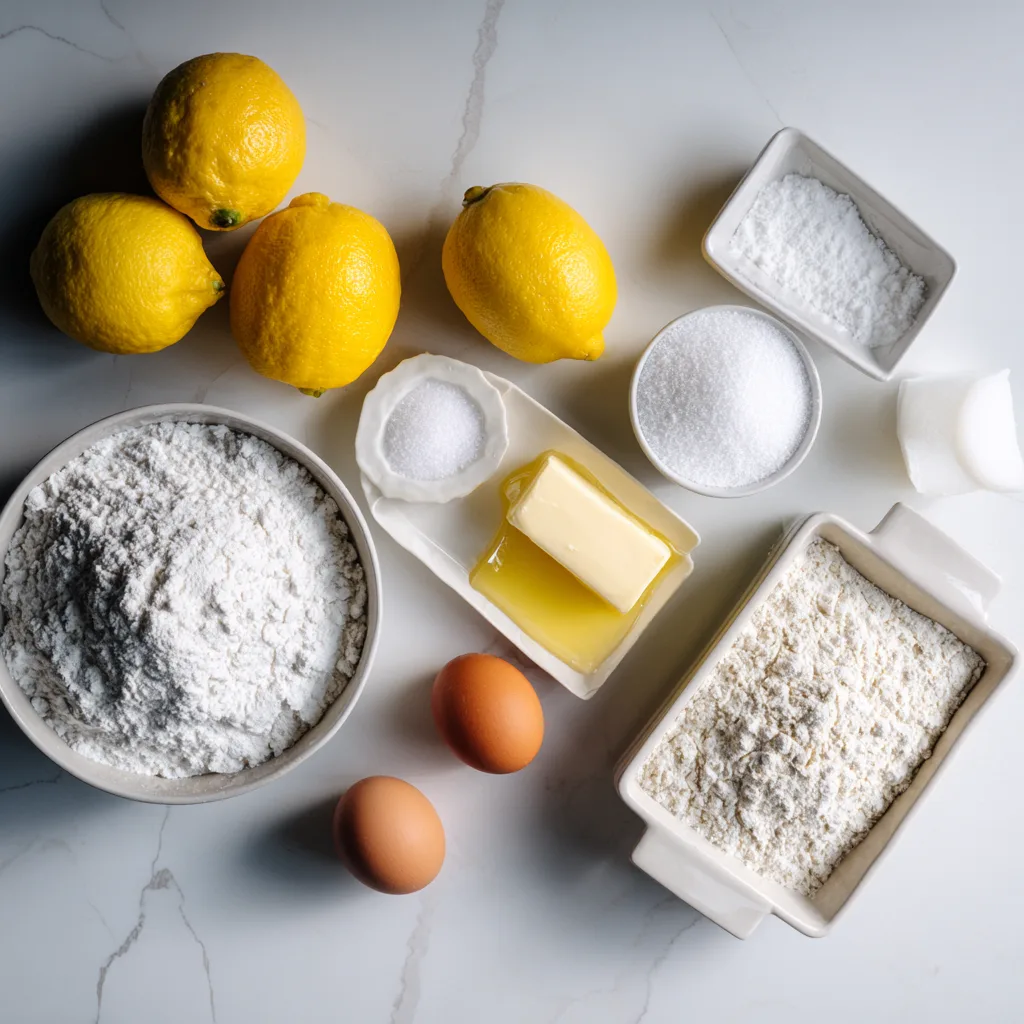
Ingredients
For the Buttery Shortbread Crust:
- 1 cup unsalted butter, softened (room temperature for easy mixing)
- 1/2 cup granulated sugar
- 2 cups all-purpose flour
- 1/4 teaspoon salt
For the Lemon Filling:
- 4 large eggs
- 1 1/2 cups granulated sugar
- 1/4 cup all-purpose flour
- 2/3 cup freshly squeezed lemon juice (about 3–4 lemons)
- 1 tablespoon lemon zest (for extra brightness)
For Finishing:
- Powdered sugar, for dusting
Instructions
Step 1: Prepare the Crust
Preheat your oven to 175°C (350°F). Line a 9×13-inch baking dish with parchment paper, leaving some overhang for easy removal.
In a mixing bowl, cream together the softened butter and sugar until smooth and fluffy. Add the flour and salt, mixing until a soft dough forms. Press this mixture evenly into the bottom of your prepared baking dish.
Bake for 18–20 minutes, or until the edges are lightly golden. Remove from the oven and set aside.
Step 2: Make the Lemon Filling
In a separate bowl, whisk together the eggs and sugar until pale and slightly thickened. Add the flour and whisk until smooth—this helps prevent lumps.
Pour in the fresh lemon juice and lemon zest, whisking until fully combined. The mixture should be smooth and slightly thin.
Step 3: Bake the Bars
Pour the lemon filling over the warm crust (this helps it set properly). Return the dish to the oven and bake for 20–25 minutes, or until the center is just set and no longer jiggles.
Remove from the oven and allow to cool completely at room temperature.
Step 4: Chill and Slice
For clean cuts, refrigerate the bars for at least 2 hours. Once chilled, lift them out using the parchment paper and slice into squares.
Dust generously with powdered sugar just before serving.
Pro Tips
- Use fresh lemon juice only—bottled juice won’t give the same vibrant flavor
- Don’t overbake the filling—it should still have a slight softness when set
- Chill thoroughly before cutting to get sharp, clean edges
- Wipe your knife between cuts for professional-looking squares
- Zest your lemons before juicing—it’s much easier
Variations
1. Lemon Coconut Bars
Add 1/2 cup shredded coconut to the crust for a subtle tropical twist.
2. Berry Lemon Bars
Swirl raspberry or blueberry puree into the lemon layer before baking for a fruity variation.
3. Meyer Lemon Bars
Use Meyer lemons instead of regular lemons for a sweeter, floral flavor profile.
Serving Suggestions
Serve these lemon bars chilled or slightly cool for the best texture. Pair them with:
- A hot cup of tea or coffee
- Fresh berries on the side
- A dollop of whipped cream
- A scoop of vanilla ice cream for a more indulgent dessert
They’re perfect for picnics, brunch tables, or as a refreshing finish to a rich meal.
Storage & Reheating
Store lemon bars in an airtight container in the refrigerator for up to 5 days. Layer with parchment paper if stacking to prevent sticking.
They can also be frozen for up to 2 months—just thaw in the fridge overnight before serving.
No reheating needed—these are best served chilled or at room temperature.
Common Mistakes to Avoid
- Using bottled lemon juice instead of fresh
- Overbaking the filling, which can make it rubbery
- Not letting the bars cool completely before slicing
- Skipping parchment paper—removal becomes difficult
- Underbaking the crust, leading to a soggy base
Cultural Context & Fun Facts
Lemon bars have long been a staple in American baking culture, especially popular in the mid-20th century when citrus desserts gained traction for their refreshing contrast to heavier sweets. They’re often found at bake sales, potlucks, and holiday dessert tables.
Interestingly, their appeal lies in their simplicity—just a handful of ingredients transforms into something bright, elegant, and universally loved.
FAQs
Can I make lemon bars ahead of time?
Yes! They actually taste better after chilling, making them perfect for preparing a day in advance.
Why is my filling runny?
It likely needed more baking time or wasn’t chilled long enough before slicing.
Can I reduce the sugar?
You can slightly reduce it, but keep in mind it balances the tartness of the lemon.
What’s the best pan size?
A 9×13-inch pan gives the ideal thickness for both crust and filling.
Can I make them gluten-free?
Yes—substitute the flour with a 1:1 gluten-free baking blend.
Zesty Sunshine Lemon Bars
Bright, tangy lemon bars with a buttery shortbread crust and smooth citrus filling.
Ingredients
Equipment
Method
- Preheat oven to 175°C and line baking dish with parchment paper.
- Mix butter, sugar, flour, and salt to form dough, press into pan and bake 20 minutes.
- Whisk eggs, sugar, flour, lemon juice, and zest, pour over crust and bake until set.
- Cool completely, chill, slice, and dust with powdered sugar before serving.
Notes
Chill well before slicing for clean edges.